Dashboard Studio: Token Eval and Conditional Panel Visibility
Platform Lizzy LiSplunk Cloud Platform 10.1.2507 includes some of our most anticipated features: conditional panel visibility, token eval, support for existing custom visualizations, and a natively supported Timeline visualization. If you have FOMO from not attending .conf25, then keep reading to see these new features in action from our .conf25 demo dashboard!
Conditional Panel Visibility
In Splunk Cloud Platform 9.0.2303, we released the ability to hide panels in Dashboard Studio when there's no data to be shown. This was the most common use case we heard from customers using conditional show/hide in Classic dashboards. Starting in Splunk Cloud Platform 10.1.2507, you can now construct more complex scenarios to determine panel visibility.
For example, in this dashboard from our .conf25 workshop, Dashboard Studio for Experts and Advanced Users, users can choose what data they want to see and whether they want to view the KPI metric or historical trend.

You can specify multiple conditions to determine panel visibility in the UI. In addition to multiple conditions, you can specify nested conditions, and whether conditions should be joined with AND or OR.

Once you've created your condition, you can associate one or multiple conditions to an object under the Configuration panel's Visibility section. Next to each condition is an eye icon. A clear eye means "show" and an eye with a strikethrough means "hide" when the condition is met.

When there are multiple conditions, they are joined by "OR" by default - as in, visibility may change when any of these conditions are met. You can change this behavior to require all conditions to be met in source. If there are both show and hide conditions, and they are both 'true', the panel will be hidden.
Token Eval
Token eval allows you to create an expression to set a token's value. It is similar to a condition, except that a condition always evaluates to true or false, whereas an eval expression can evaluate to true/false, a numeric, a string, or an array.
In our .conf25 workshop example, we have a button to toggle between viewing KPI metrics or historical trends. The button label changes depending on what is being shown. If the dashboard is currently showing the KPI metrics, the button label is "Show trends". Once clicked, and the dashboard switches to showing historical trends, the button label updates to "Show metrics".

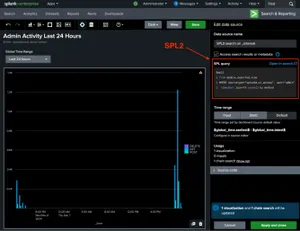
Currently, token eval expressions need to be defined in source. There is a new stanza called "expressions" where you will find both your conditions and token eval expressions. Here's an example:
   "expressions": {
       "conditions": {
           "condition_MNC0mRhK": {
               "name": "show trends",
               "value": "$showTrend$ = \"true\""
           },
           "condition_W6MKHKFw": {
               "name": "show metrics",
               "value": "$showTrend$ = \"false\""
           }
       },
       "eval": {
           "expr_1": {
               "name": "toggleTrend",
               "value": "$showTrend$ = 'true' ? 'false' : 'true'"
           },
           "expr_2": {
               "name": "trendBtnLabel",
               "value": "$showTrend$ = 'true' ? 'Show metrics' : 'Show trends'"
           }
       }
   }
For our button example, we created two expressions: one to evaluate the current state (showing trends or showing metrics) and one to evaluate the button label:
- expr_1 sets a token $showTrend$ to true/false depending on its previous state
- expr_2 sets a string "Show Metrics" or "Show Trends" depending on the $showTrend$ value
The button label is then referenced using the syntax $eval:trendBtnLabel$

As you can see from these examples, the combination of token eval and conditional show/hide enable you to create complex and dynamic dashboards in Dashboard Studio.
Support for Existing Custom Visualizations
You may have use cases that require specific visualizations to properly display data and convey a story, and that Splunk might not provide out of the box. With Classic dashboards, you could plug in custom visualizations that you created yourself or downloaded from Splunkbase. Now you can use those same custom visualizations in Dashboard Studio!
Any custom visualizations installed in your environment (including previously installed custom visualizations apps) will now be available to add to your Studio dashboards. You can add them via the "Add chart" option in a dashboard or from the search page.
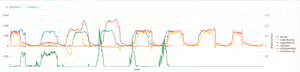
Below is the demo dashboard used for our .conf25 hands-on workshop, Dashboard Studio for Beginners and Non-Designers. It includes the Sunburst custom visualization, and as you can see from the gif, includes interactions!

Timeline Visualization
We have added native support for Timeline visualization, which displays activity intervals and events over time for a set of resources. Timeline visualization is great for visualizing sequences of events or overlapping activities and ensuring consistent time scaling. Use Timeline visualization for tracking resource utilization, project timelines, or event patterns over time.

You can specify custom color palettes to your timeline visualization, similar to other visualizations. You can apply dynamic coloring with match values or range values, and static coloring by choosing specific colors for each series name.
Coming Soon
Check out Dashboard Studio and send in your feedback through Splunk Ideas, and you might see your feature request listed on a future blog's "coming soon" list! We are continuing to work on new capabilities, which are delivered incrementally with Splunk Cloud Platform and Splunk Enterprise releases.
Next Up….
- Support for SPL2 data sources
- Network graph visualization
- Classic to Studio dashboard conversion enhancements
- Dashboard Studio export support for tabbed dashboards and large dashboards
Helpful Resources
- Dashboard Studio demo
- Dashboard Studio Blogs - Catch up on our other recent updates with Studio
- Dashboard Studio Tutorial
- Improving Dashboard Performance and Resource Usage Tech Talk
- Splunk Dashboard Studio Documentation
- Splunk Ideas - Dashboard Studio for feature or enhancement RequestsExamples Hub - Find the Examples Hub from the Dashboards page in Search & Reporting
- Splunk Community - Dashboards & Visualizations for questions
* This information is subject to change at any time, at the sole discretion of Splunk Inc. and without notice. This roadmap information shall not be incorporated into any contract or other commitment. Splunk undertakes no obligation to either develop or deliver any product, features, or functionality described here.
Related Articles

Reports, Sharing and More! What’s New in Splunk Mobile This Summer
Cyclical Statistical Forecasts and Anomalies - Part 2