Splunk SOAR Playbook of the Month: Investigations with Playbooks
It comes as no surprise that analysts spend a lot of their time investigating and responding to a continuous flood of incidents on a daily basis. While the sheer volume of alerts alone make for a time consuming endeavor, trying to manually tackle so many of these alerts results in slow incident response and can trap your team into a series of reactive security operations.
Splunk SOAR can help analysts better examine and investigate potential threats and improve their approach to threat triage through the power of automation. For this month’s edition of Playbook of the Month, we’ll look at how you can perform investigations at machine speed using Splunk SOAR and one of our investigation playbooks, Internal Host WinRM Investigate.
The Playbook
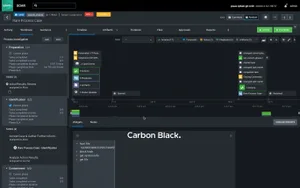
The Internal Host WinRM Investigate Playbook performs a general investigation on key aspects of a windows device using windows remote management. Important files related to the endpoint are generated, bundled into a zip, and copied to the container vault. Prior to running the playbook, there are a few additional steps that you can take to help improve how Splunk SOAR can identify possible indicators of compromise.
Getting Started
- From the artifacts tab, click on artifact from an alert to and review the description of the potentially malicious activity
- Click the fileHash value, then click on the Run Action tab on the window that appears.
- Click the Investigate drop down option and select file reputation from the list of actions. In the run action window that appears, select your file reputation program and click Launch to run a report. For this example, we’ll be using VirusTotal
- Once the report is generated, review the results to confirm if the process in question is malicious. If so, the next step is to update your IoCs.
Updating Your IoCs
- From the report you ran, look at the resource section of the report to see the hash you ran a query on. Click the hash and from the overview window that appears, click the +Tag button.
- This opens the Edit Tags window. From here, you can adjust your tags to include things like “Suspicious,” “virustotal,” and “high_risk_score.” Once you’ve added your tags, click the save button.
- This will increase the library of indicators that Splunk SOAR has access to.
Running the Playbook
- Click the Playbook button on your navigation bar and search for the WinRM Investigate Host playbook.
- Click the Run Playbook button to generate a capture of all hosts related to the incident. Your analyst screen will start to show services, processes, and sessions. This allows you to easily review for potential malicious activities based on your earlier investigation.
- Splunk SOAR will also run an additional data collection script and provides you with a ZIP file with even more data on the queried system.
Watch the video to see this playbook and setup process in action.
By using this playbook, you can get a more holistic snapshot of your endpoints and gain valuable insights into potential malicious threats that might be affecting them.
Be sure to check out research.splunk.com/playbooks to explore even more useful playbooks. Additionally, if you haven’t seen last month’s blog and video, be sure to give them a look here. We look forward to hearing about your experience with this month’s featured playbook as well as any other playbooks you’ve recently implemented. We’ll be back next month with more playbooks and demos, but until then, get out there and get automating!
Related Articles

SOARing to the Clouds with Splunk SOAR

