false

Cisco ASA Data (Adaptive Security Appliance)

Optimize Cisco ASA data with Splunk's Data Management Pipeline Builders

Whether you’re filtering out low-priority firewall logs or reducing noisy events, Splunk’s Edge Processor (customer-hosted) and Ingest Processor (Splunk-hosted Saas) let you filter, transform, and optimize Cisco ASA logs before routing to Splunk platform of Amazon S3 for low-cost storage.

With just a few clicks, you can apply pre-built templates to:

  • Reduce unnecessary log ingestion and optimize license usage
  • Improve search performance by focusing only on high-value events
  • Route processed data directly to the Splunk Platform for real-time analysis or to Amazon S3 for low-cost, long-term storage (data in S3 can be later accessed using FSS3 if needed)

Get started quickly with out-of-the-box templates and preview the results before applying any changes with no custom code required.

How to use the Cisco ASA template

The Cisco ASA Pipeline Template is a pre-built SPL2-based logic that helps you clean, filter, and route your Cisco ASA logs, before they even reach your Splunk index. 

Note: This pipeline template can be applied in both Edge Processor and Ingest Processor. Unless you already have Edge Processor configured, we recommend using Ingest Processor to avoid additional configuration steps. 

Here’s how you can get started:

Watch the Cisco ASA Pipeline Template demo

This video walks you through how to apply the Cisco ASA log reduction pipeline template. Follow along to quickly start filtering and routing your Cisco ASA logs.

Step-by-Step Instructions

data-management

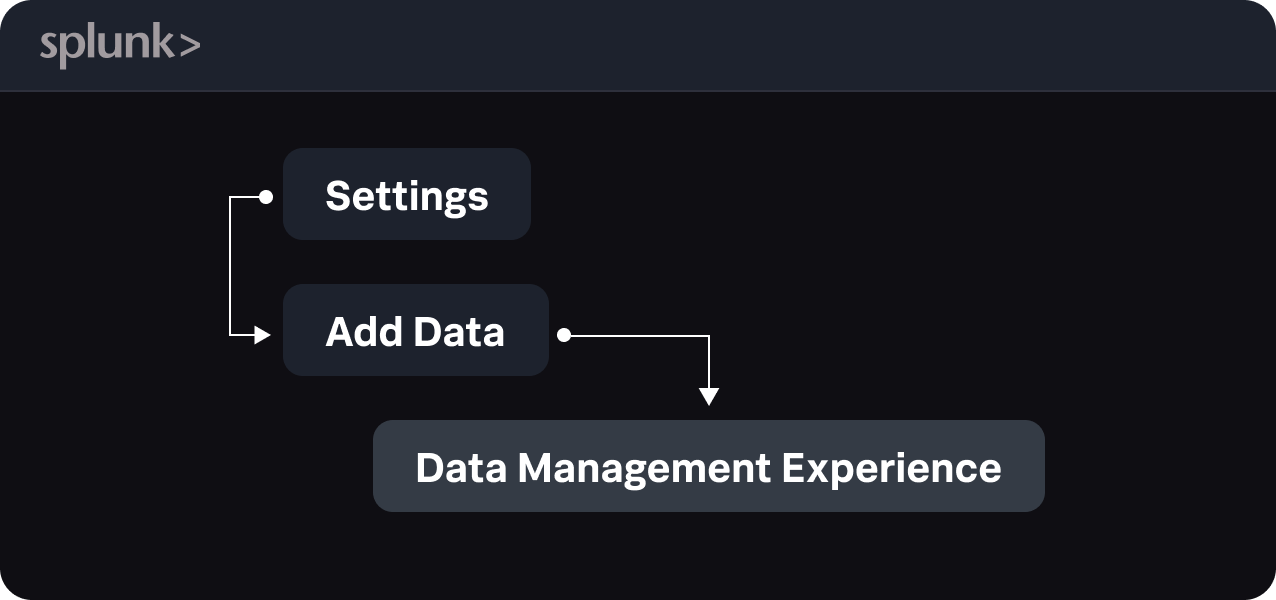
1. Access Your Data Management Console

Log in to your Splunk Cloud Platform and navigate to Settings → Add Data → Data Management Experience.

cisco-asa-river-step-1
cover-flow

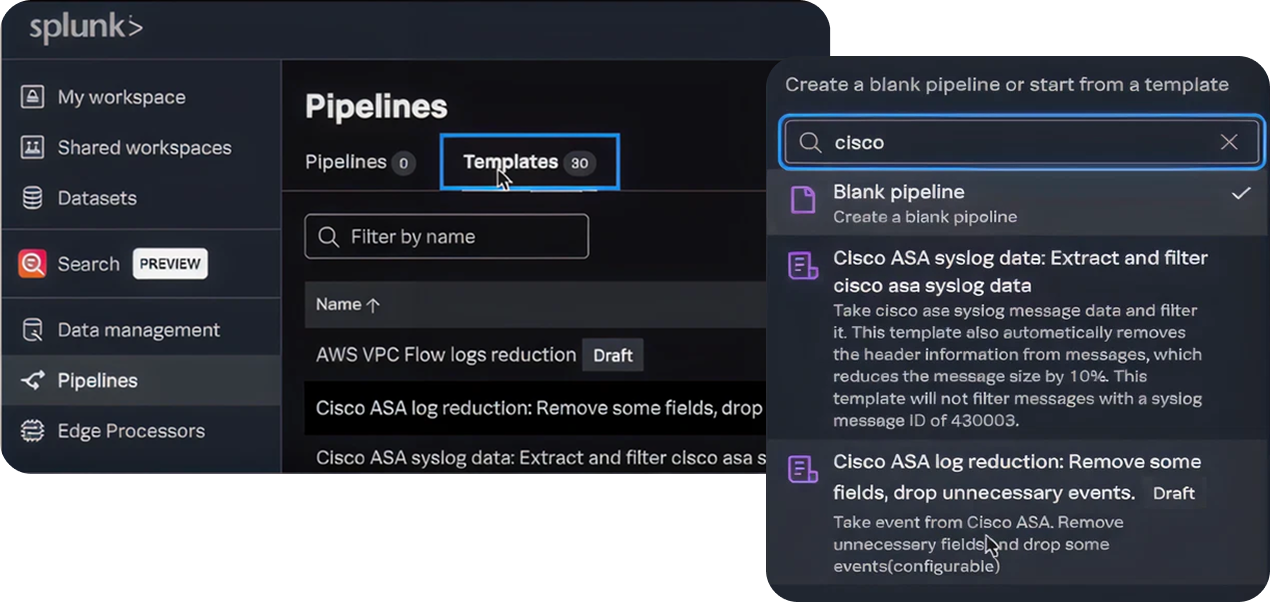
2. Find the Template 

From your Data Management homepage, select Pipelines → Templates, then search for Cisco ASA log reduction.

cisco-asa-river-step-2
pipeline

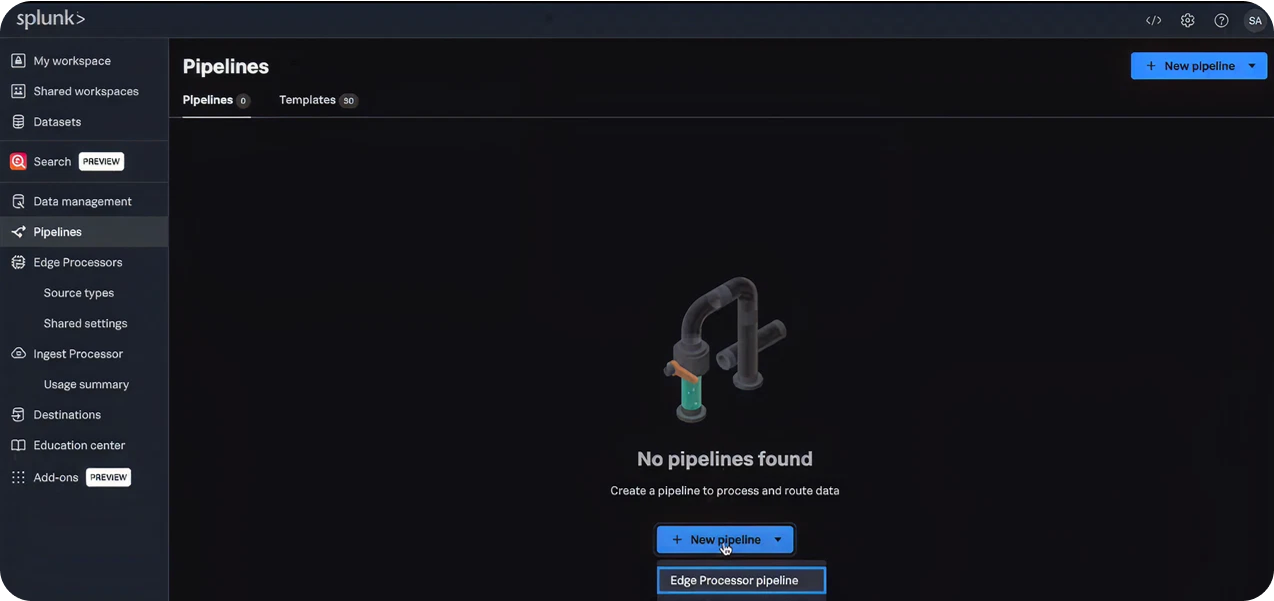
3. Create Your Pipeline

Click Create Pipeline, select the Ingest or Edge Processor option, and apply the Cisco ASA template. This gives you a ready-to-use pipeline with logic that:

  • Identifies Cisco ASA log events by message ID
  • Filters out low-priority and noisy messages
  • Sends only essential logs to the Splunk index of your choice
cisco-asa-river-step-3
log-management

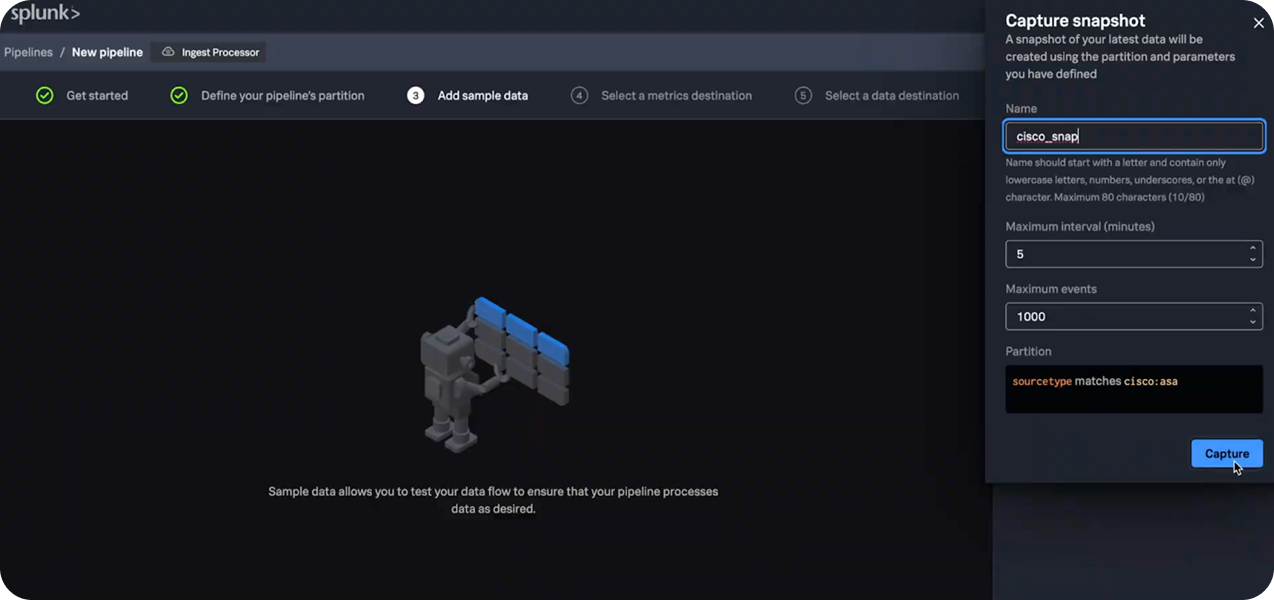
4. Test Before You Deploy

Use live data snapshots or sample logs to preview what the pipeline will do. You’ll see exactly which logs are kept and which are dropped.

cisco-asa-river-step-4
configuration-management-database

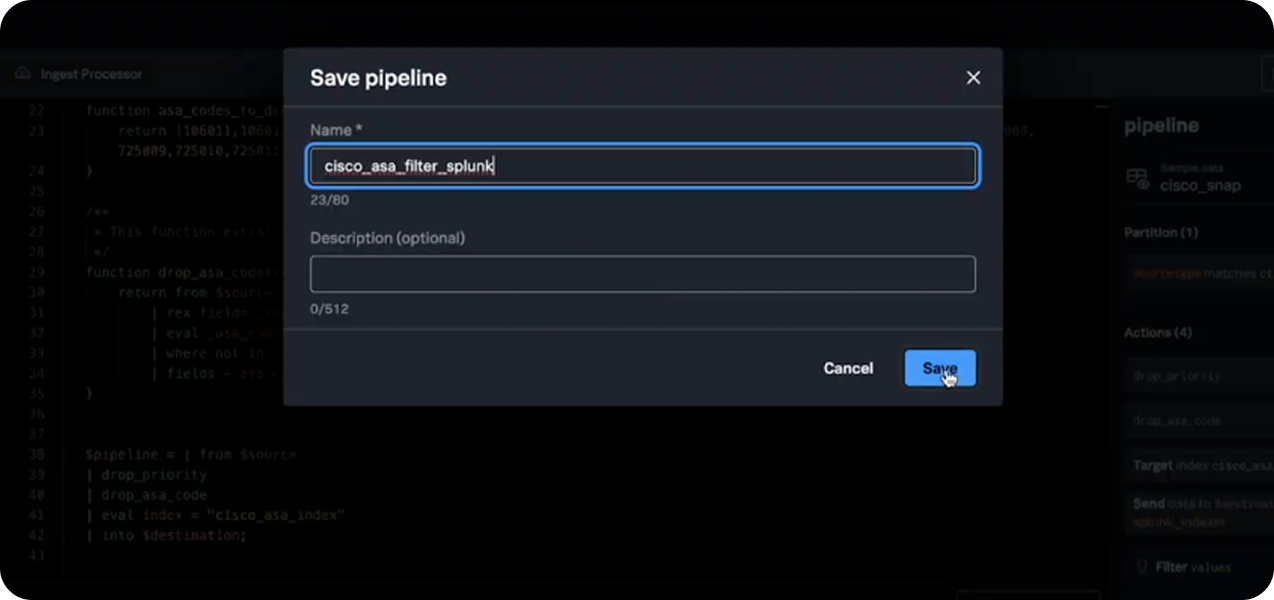
5. Save and Apply the Pipeline

Give your pipeline a name (like cisco_asa_filter_splunk) and apply it. From that point forward, incoming Cisco ASA logs will be filtered and stored exactly as configured.

cisco-asa-river-step-5
search-head

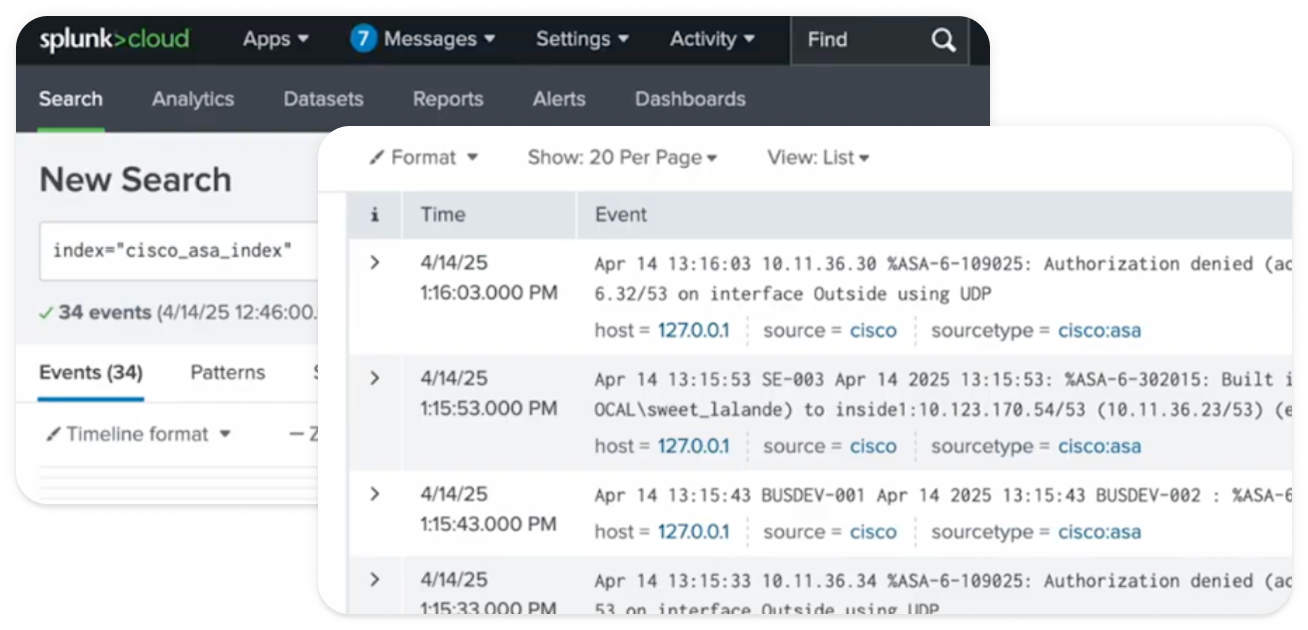
6. Validate the Results

  • Go to Search & Reporting in Splunk.
  • Run a search on your destination index (example: index=cisco_asa_index).
  • You’ll notice significantly fewer logs, only the most relevant Cisco ASA messages are being indexed.
cisco-asa-river-step-6

Cisco ASA Log Reduction Pipeline

You can use this SPL2 code to customize your pipeline template as you see fit.

import 'cisco_msg_id.csv' from /envs.splunk.'eps-shw-522513dc5758f0'.lookups
import route from /splunk/ingest/commands
import logs_to_metrics from /splunk/ingest/commands


function extract_useful_fields($source) {
   return | from $source
   /* Extracted message matches with ASA or FTD */
   | rex field=_raw /(?P<_raw>(%ASA|%FTD).*)/
   /* Extract message number */
   | rex field=_raw /(%ASA|%FTD)-\d+-(?P\d+)/
   /* Extract username */
   | rex field=_raw /^[^'\n]*'(?P[^']+)/}


function drop_security_noise($source) {
   return | from $source
   | where message_id != "302013"
   | where message_id != "302015"
   | where message_id != "302016"
   | where message_id != "110003"
   | where message_id != "110002"
}


function mask_usernames($source) {
   return | from $source
   | eval _raw=replace(_raw, username, "[NAME_REDACTED]")
}


function enrich_with_explanation($source) {
   return | from $source |
   lookup 'cisco_msg_id.csv' message_id AS message_id OUTPUT explanation AS explanation
}


$pipeline = | from $source
 // extract the useful fields
    | extract_useful_fields
 // Filter "302013", "302015" message ID number
    | drop_security_noise
 // enrich log events with explanations based on message ID
    | enrich_with_explanation
 // convert logs to metrics and send to o11y cloud
     | thru [
        | logs_to_metrics name="cisco_asa" metrictype="counter" value=1 time=_time dimensions={"message_id": message_id}
       | into $metrics_destination
     ]
 // send authentication logs to Splunk index
     | route message_id == 109025, [
      // Mask usernames to protect PII
      | mask_usernames
      | fields -username 
      | eval index = "cisco_auth_logs"
      | into $splunk_destination
  ]
// // Archive rest of the logs to AWS S3
| into $aws_s3_destination;

Resources

Get Started

Try Splunk Observability Cloud free for 14 days.

Contact Sales