false

Palo Alto Networks (PAN) Data

Optimize PAN firewall data with Splunk's Data Management Pipeline Builders

Whether you need to classify raw PAN logs for better field extractions or reduce event sizes to lower storage costs, Splunk makes it simple with powerful pre-built templates and flexible deployment options.

Choose between the Edge Processor for customer-hosted control or the Ingest Processor for a fully managed Splunk SaaS experience. With pipeline builders, you can:

  • Automatically apply accurate source types to PAN logs for better field enrichment
  • Reduce log volume and storage costs by removing redundant or unused fields
  • Route processed events to the Splunk Platform for immediate operational use or to Amazon S3 for cost-effective archival

Start faster by using built-in templates and previewing data transformations before committing any changes, all without writing SPL

How to Use the PAN Data Pipeline Template

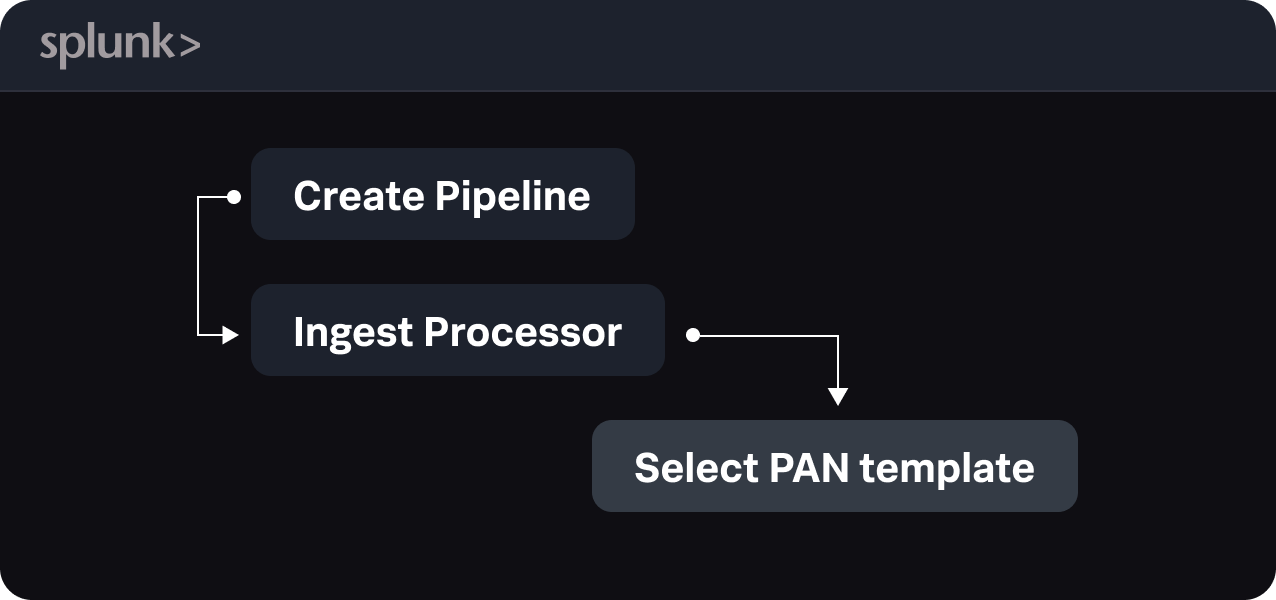
The PAN Pipeline Template is a pre-built SPL2-based logic that helps you classify, enrich, and optimize Palo Alto Networks logs, improving field extractions and reducing event sizes before they’re indexed in Splunk. 

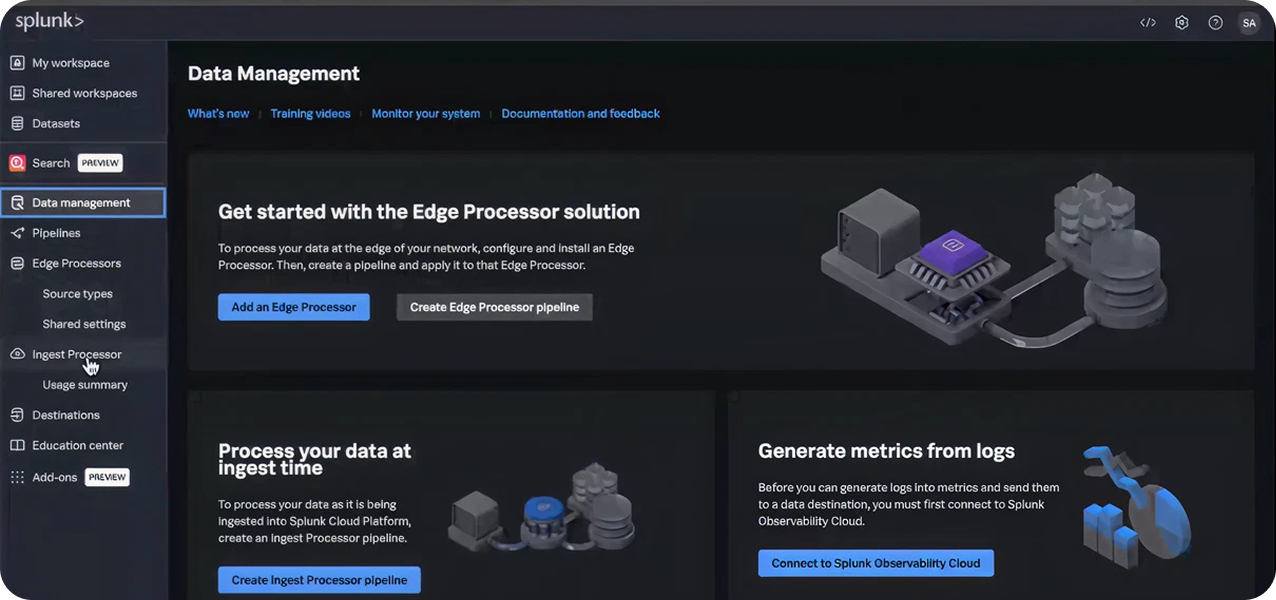
Note: This pipeline template can be applied in both Edge Processor and Ingest Processor. Unless you already have Edge Processor configured, we recommend using Ingest Processor to avoid additional configuration steps.  

Here’s how you can get started:

Watch the PAN Template Demo Video

This video walks you through how to apply the PAN log reduction pipeline template. Follow along to quickly start filtering and routing your PAN logs. .

Step-by-Step Instructions

data-management

1. Access Your Data Management Console

Log in to your Splunk Cloud Platform and navigate to Settings → Add Data → Data Management Experience.

pan-river-step-1
cover-flow

2. Find the Template 

Go to Data Management → Pipelines → Templates, then search for:

  • Palo Alto Networks PAN-OS syslog data: Extracts fields and classification of Palo Alto logs
  • Palo Alto Networks Logs: Reduce log size
pan-river-step-2
pipeline

3. Create Your Pipeline

Click Create Pipeline, select the Ingest or Edge Processor option, and apply the Cisco ASA template. This gives you a ready-to-use pipeline with logic that:

  • Automatically assigns accurate source types to PAN firewall logs
  • Enables proper field extractions via Splunk’s PAN TA (Technology Add-on)
  • Optionally removes unused fields to save on disk and license usage
pan-river-step-3
log-management

4. Test Before You Deploy

Capture a live snapshot of incoming PAN events or use built-in sample logs. This lets you preview:

  • What logs look like before and after classification
  • How much smaller your optimized logs become (if using the optimization template)
pan-river-step-4
configuration-management-database

5. Save and Apply the Pipeline

Give your pipeline a name (like pan_classify or pan_optimize), then apply it. From that point forward:

  • Logs are routed to the right indexes
  • Fields are extracted for search and dashboards
  • Storage savings kick in immediately with optimized logs
pan-river-step-5
search-head

6. Validate the Results

  • Give it a few minutes for new data to flow in.
  • Refresh your Splunk dashboard or search.
  • You should now see:
    • PAN events split across correct source types
    • Field extractions visible in “Interesting Fields”
    • Events routed to proper indexes
pan-river-step-6

Resources

Get Started

Try Splunk Observability Cloud free for 14 days.

Contact Sales