Splunk 9.0 SmartStore with Microsoft Azure Container Storage
With the release of Splunk 9.0 came support for SmartStore in Azure. Previously to achieve this, you’d have to use some form of S3-compliant broker API, but now we can use native Azure APIs.
The addition of this capability means that Splunk now offers complete SmartStore support for all three of the big public cloud vendors.
This blog will describe a little bit about how it works, and help you set it up yourself.
Pre-requisites:
- A new, standalone instance of Splunk 9.0 or greater
- Command line access to this Splunk instance
- An Azure subscription with the ability to create Azure Storage Accounts
What Is SmartStore? And Why Should I Use It?
Splunk SmartStore is a distributed scale-out model that provides a data management model which brings in data closer to the compute on-demand, provides a high degree of compute/storage elasticity and makes it incredibly cost efficient to achieve longer data retention at scale. Effectively, it decouples your storage and compute.
Typically, if you’re running a Bring Your Own License(BYOL) model in AWS, GCP or Azure, you’ll likely want to be using SmartStore to reduce your storage costs.

Typical SmartStore architecture
How Splunk SmartStore Works With Azure
In a similar fashion to SmartStore for AWS and GCP, Splunk provides everything you need packaged in the 9.0 release to set this up and leverages the included Azure SDK for C++. But don’t worry about that! We’re not going to be doing any coding.
Let’s Set It Up
We’ll be setting up SmartStore to work on a single node instance (non-clustered) of Splunk. First off, we’ll need to jump into Azure to set up the storage.
There are multiple authentication methods you can use to allow your Splunk instance to access Azure Storage. For this blog, we will be using access keys. For production environments, it’s recommended to use either Azure AD or SSL certificates.
Setting Up Your Azure Storage Account
-
Navigate to Azure Portal > Azure Storage Account > Create New

Select your subscription and your resource group. For the access keys authentication method, it’s not super important which resource group you use. For more advanced authentication methods, like Azure AD, selecting the right resource group is important.
Note: Select the correct region for your storage account. With access keys authentication, you’ll want to select the region closest to your Splunk environment. If you’re using Azure AD authentication, your region must be the same as the region your Splunk server(s) are hosted in.
Your storage account name will form part of the URL used to access your storage, and will also be the name of your access key. So name it appropriately.
For the benefit of keeping this blog post short, you can click “Review & Create”. There are more settings you can configure to suit your needs. Here’s how mine looks:

Next, you’ll want to create a storage container. In the AWS world, we’d call this a Bucket.
Storage Accounts > “Your Storage Account Name” > Containers > “+ Container” (Create new container)

Always keep the container private. You’ll definitely not want any anonymous access.
Your container should now be ready, now we need to set the access to it.
Navigate to Storage Accounts > “Your Storage Account Name” > Access Keys
You should see something similar to this:

Note: Click Rotate Key right away. The key that is issued on creation of the storage account doesn’t always work
In this picture, you can see 2 of the indexes.conf settings you’ll need.
That’s the Azure part done. If you click into the container you’ve just created, you should see it’s empty.
Configuring Splunk - A Standalone Indexer
Onto the Splunk part. You’re going to want to create a new indexes.conf. Splunk Best Practices recommend creating a new app for this. Here’s the shell command I used:
mkdir -p /opt/splunk/etc/apps/kt_indexer_volume_indexes/local
Then you’ll want to create a new indexes.conf in this app:
vi /opt/splunk/etc/apps/kt_indexer_volume_indexes/local/indexes.conf
Here’s my config in the indexes.conf:
[default]
remotePath = volume:remote_store/$_index_name


[volume:remote_store]
storageType = remote
remote.azure.endpoint = https://splunksmartstore.blob.core.windows.net
remote.azure.container_name = splunk
path = azure://splunk-indexes
remote.azure.access_key = <your storage account name>
remote.azure.secret_key = <Your secret key>
It’s this simple. By default, Splunk will use the azure-sse-ms encryption. This means the encryption keys are managed by Azure. You can change this to Customer Managed Keys, but we currently do not support Customer Provided Keys.
When you’re done with your indexes.conf. Restart Splunk.
Check Your Work
If everything has worked, you should see buckets being uploaded to your Azure Container.

And you’re done! You’ve just set up Splunk SmartStore for Azure.
Note for Clustered Environments:
If you’re working with Distributed Splunk architectures with indexer clusters, the configuration method is almost identical to what we’ve just done - see here: setting up SmartStore on a new indexing cluster
Troubleshooting
If for any reason you’re having trouble with the above instructions, the first thing you’re going to want to do is to edit your splunk-launch.conf in your splunk/etc folder. Add this line at the bottom:
AZURE_LOG_LEVEL = debug
And restart Splunk. This will give you more detail in your splunkd_stderr.log (locating in your splunk/var/lib around what the problem is. But remember, once you’ve fixed the issue, turn debug off by removing that line.
You can also test your connection by using Splunk's built-in RFS command
splunk cmd splunkd rfs -- ls --starts-with volume:remote_store
Where remote_store is your volume name. This will simply list the objects in your Azure container, but with debug mode activated, it’ll show you any issues it’s encountering with the connection.
Happy Splunking!
Related Articles

Announcing the General Availability of Splunk POD: Unlock the Power of Your Data with Ease
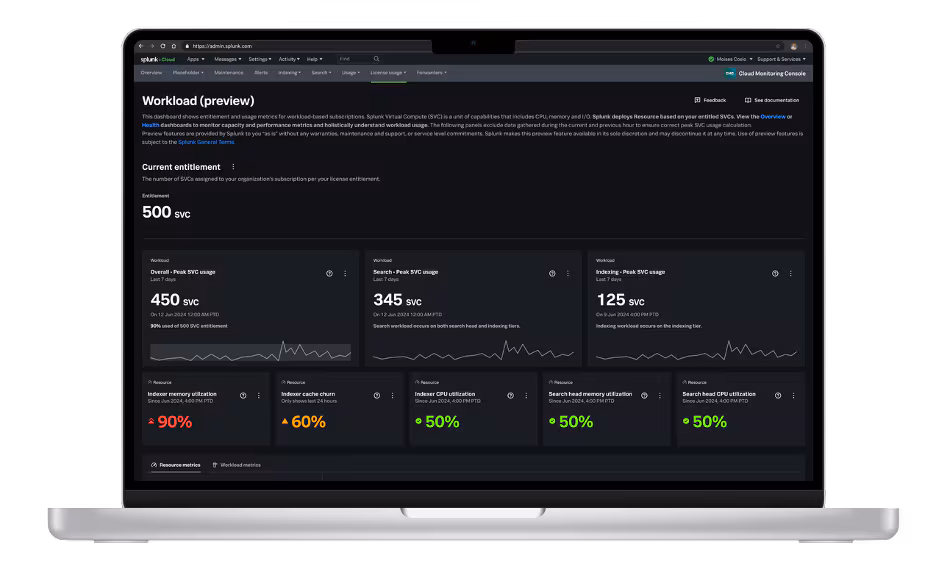
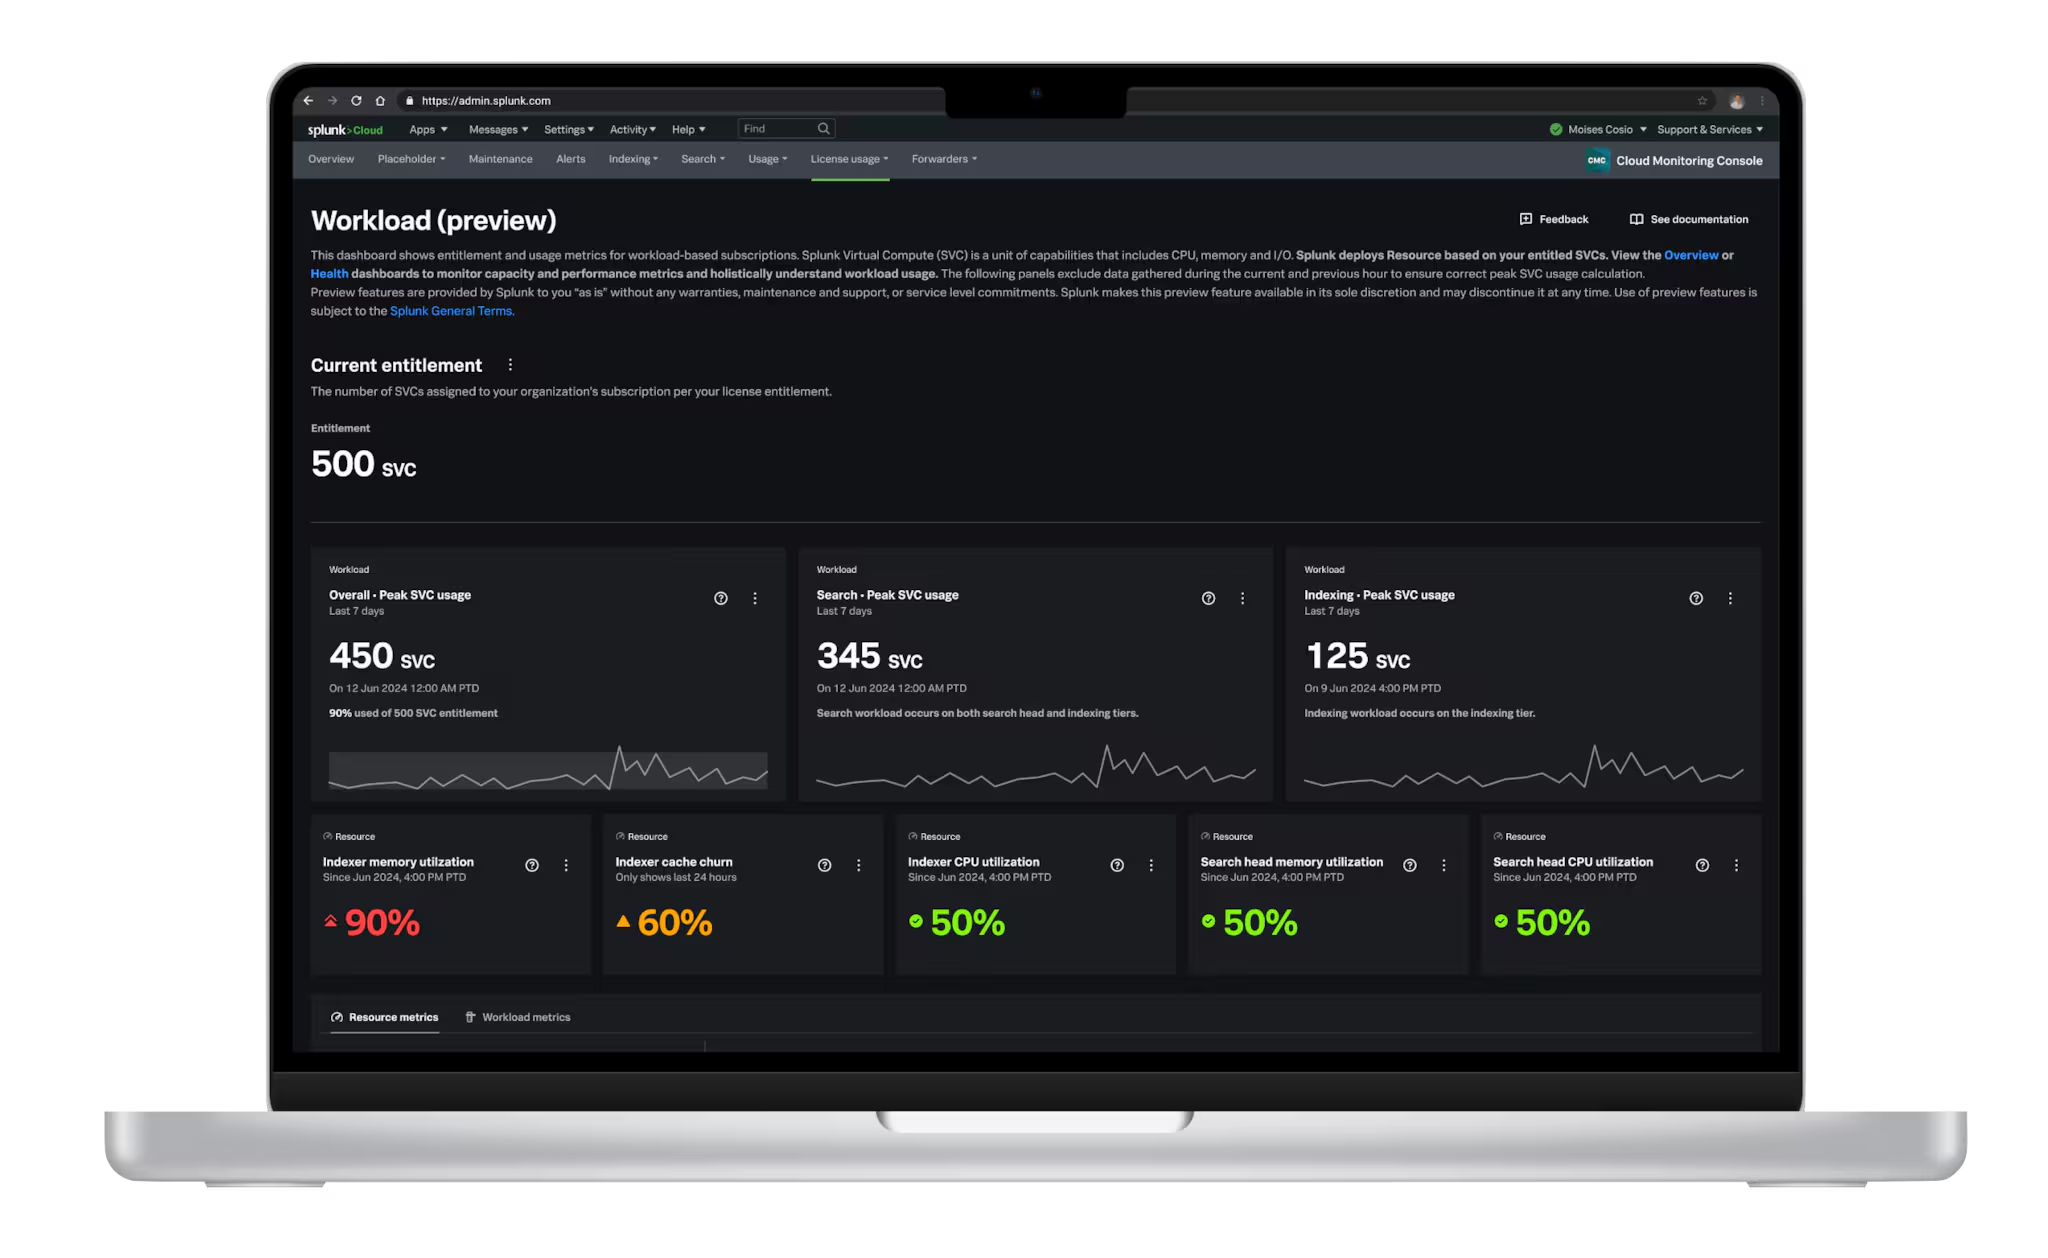
Introducing the New Workload Dashboard: Enhanced Visibility, Faster Troubleshooting, and Deeper Insights

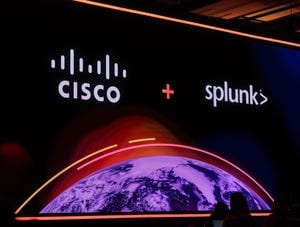
Leading the Agentic AI Era: The Splunk Platform at Cisco Live APJ

Dashboard Studio: Token Eval and Conditional Panel Visibility
Introducing Resource Metrics: Elevate Your Insights with the New Workload Dashboard
Powering AI Innovation with Splunk: Meet the Cisco Data Fabric

Remote Upgrader for Windows Is Here: Simplifying Fleet-Wide Forwarder Upgrades

Dashboard Studio: Spec-TAB-ular Updates